Create LEGO Stop Motion Animation: Your Ultimate Guide
Advertisements
This comprehensive guide details the process of creating engaging Lego Stop Motion Animation, from initial concept to final editing, empowering enthusiasts to bring their brick-built worlds to life.
Anúncios
Have you ever watched your favorite animated movies and wondered how those incredible scenes came to life? Imagine taking your beloved LEGO bricks and minifigures and making them move, tell stories, and even perform amazing feats. Welcome to the exciting world of Lego Stop Motion Animation, where your imagination is the only limit to what you can create. This guide will walk you through every step, transforming your LEGO collection into a vibrant storytelling tool.
Understanding the Magic of Stop Motion
Stop motion animation is a captivating technique that brings inanimate objects to life through a series of still photographs. Each photo captures a tiny movement, and when played back in sequence, these individual frames create the illusion of continuous motion. It is a meticulous yet incredibly rewarding process, especially when working with the versatile and universally loved LEGO bricks.
Anúncios
The core principle behind stop motion is incremental change. You capture a photo, move your subject a minuscule amount, capture another photo, and repeat. This method has been used for over a century in various forms, from classic claymation to modern CGI-enhanced films. With LEGO, you have an endless supply of characters, props, and environments, making it an ideal medium for aspiring animators of all ages.
The illusion of movement
To achieve smooth animation, understanding how many frames per second (fps) your video will play is crucial. Most professional animations aim for 24 fps, meaning 24 individual photos are needed for every second of screen time. For beginners, 10-15 fps can still yield impressive results and is less demanding to produce.
- Frame Rate: Decide on your target frames per second (fps) early on.
- Small Increments: Move your LEGO characters and objects in very small steps between each photo.
- Consistency: Maintain consistent lighting and camera position throughout your shoot.
The beauty of stop motion lies in its tactile nature. You are physically manipulating your characters, giving each movement a deliberate and personal touch. This hands-on approach is what makes Lego Stop Motion Animation such a unique and engaging art form, allowing creators to truly connect with their stories.
Ultimately, understanding the magic of stop motion means appreciating the patience and precision involved. It’s about breaking down complex actions into simple, manageable steps, and then reassembling them into a fluid, dynamic narrative. This foundational knowledge will serve as your springboard into creating truly memorable animations.
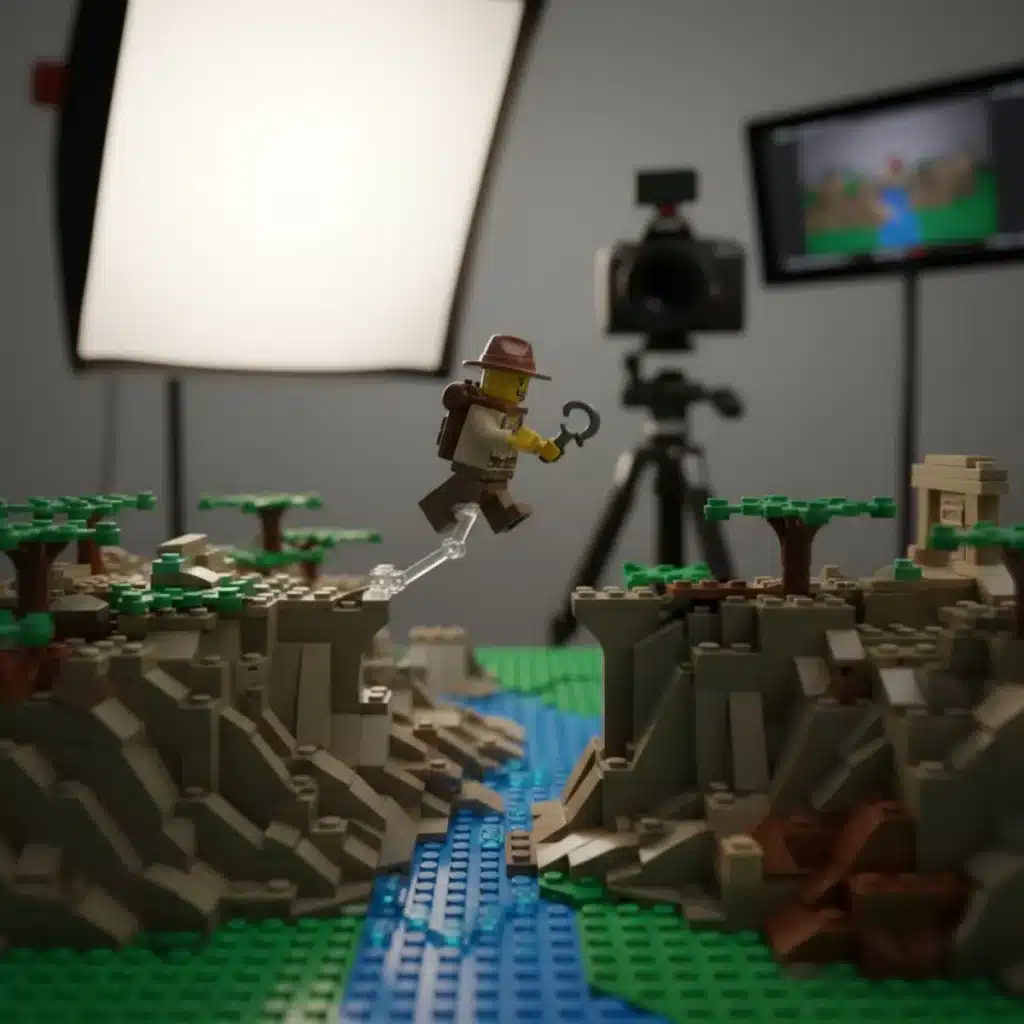
Essential Equipment for Your Lego Animation Studio
Before you dive into animating, gathering the right equipment is key to ensuring a smooth and high-quality production. While professional studios use specialized gear, you can achieve fantastic results with readily available tools, many of which you might already own. The goal is to create a stable and controlled environment for your animation.
At its heart, stop motion requires a camera, a stable surface, and good lighting. Beyond these basics, a few additional items can significantly enhance your workflow and the final look of your animation. Investing a little time in setting up your workspace properly will pay dividends in the quality and enjoyment of your project.
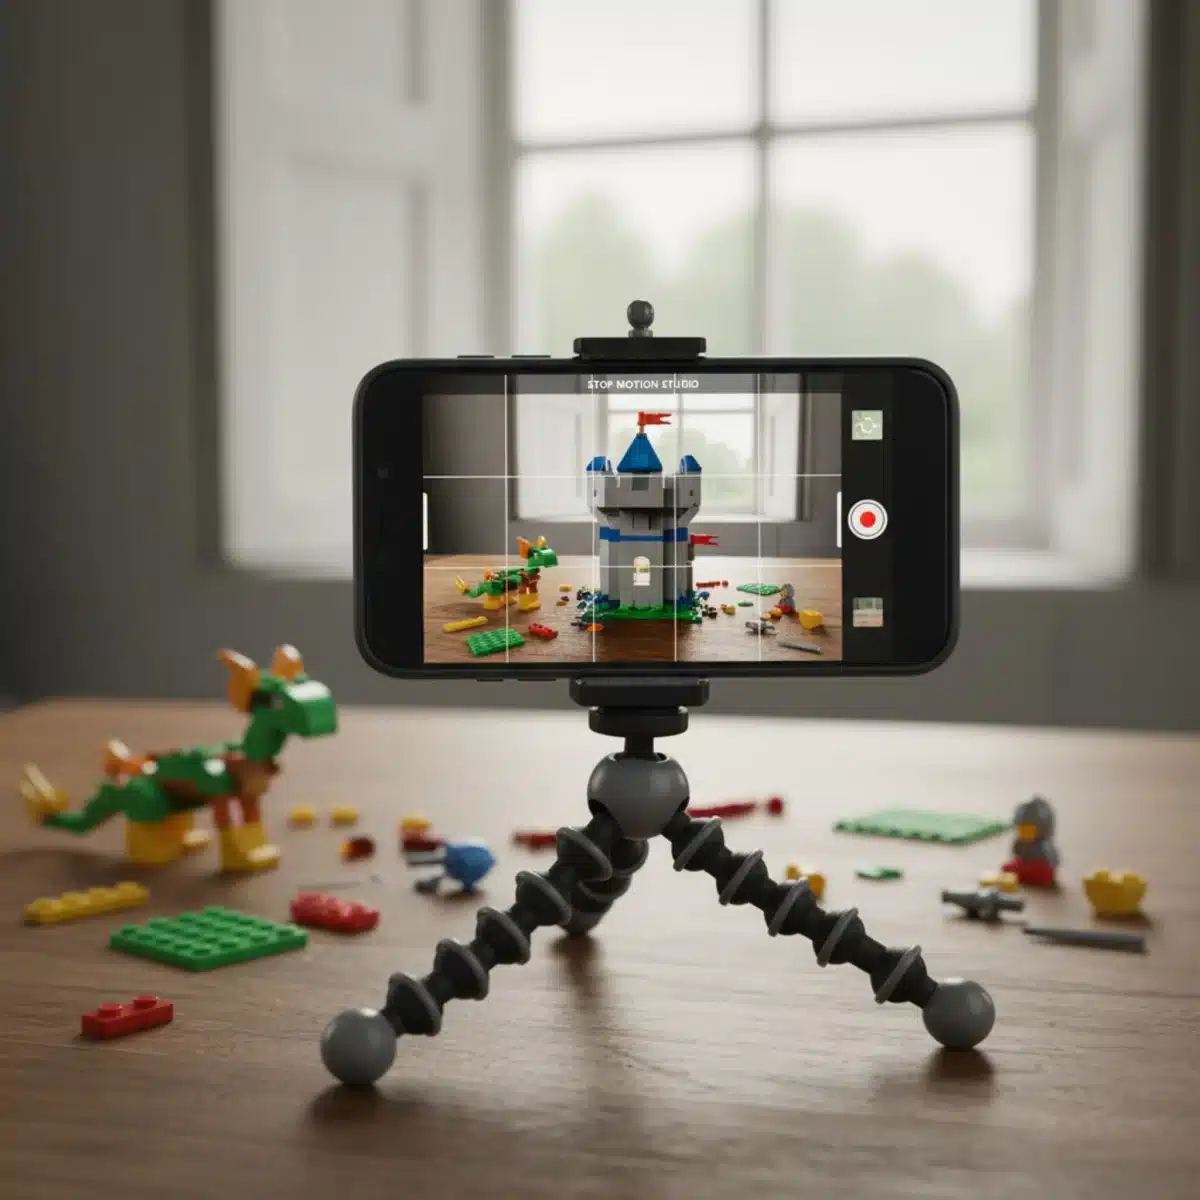
Camera choices and stability
Your camera is arguably the most important piece of equipment. While professional DSLR cameras offer the best quality, a smartphone or tablet with a good camera can work wonders. The key is stability.
- Smartphone/Tablet: Excellent for beginners; requires an app for stop motion.
- DSLR/Mirrorrorless Camera: Offers higher resolution and more control; needs special software.
- Tripod: Absolutely essential to keep your camera perfectly still between shots.
A sturdy tripod prevents accidental bumps and shifts, which can ruin the illusion of movement. Even a slight camera movement between frames will result in a shaky, unprofessional-looking animation. Consider a flexible mini-tripod for smartphones, allowing you to position your camera at various angles.
Lighting and set-up
Consistent lighting is paramount in stop motion. Fluctuating light sources, like sunlight from a window, can cause flickering in your final video. Aim for soft, diffused light that remains constant throughout your entire shooting session.
- LED Lights: Provide consistent, cool light. Desk lamps with LED bulbs work well.
- Diffusers: Use parchment paper or white fabric to soften harsh light and reduce shadows.
- Backdrops: Simple, solid-colored paper or fabric can create a clean background for your LEGO scenes.
Setting up your animation area in a dedicated spot, away from foot traffic and direct sunlight, is highly recommended. This helps maintain the integrity of your set and ensures consistent conditions. With a stable camera, reliable lighting, and a well-organized set, you’re well on your way to creating compelling Lego Stop Motion Animation.
Having the right equipment doesn’t mean you need to break the bank. Start with what you have, and gradually upgrade as your skills and passion for stop motion grow. The most important tool is your creativity.
Crafting Your Story: From Idea to Script
Every great animation begins with a great story. Even a short Lego Stop Motion Animation benefits from a clear narrative, defined characters, and a planned sequence of events. Don’t just start moving bricks; take the time to brainstorm and outline your story. This foundational step will save you countless hours during the filming process and result in a more cohesive and engaging final product.
Think about what kind of story you want to tell. Is it an action-packed adventure, a heartwarming tale of friendship, or a silly comedy? LEGO offers endless possibilities for genres and themes. Once you have a general idea, start thinking about your characters and the world they inhabit.
Brainstorming and character development
Your LEGO minifigures are your actors. Give them personalities, motivations, and even unique voices (which you can add in post-production). Consider their roles in the story and how their actions will drive the plot forward.
- Character Personalities: Define what makes each minifigure unique.
- Motivation: What do your characters want or need?
- Conflict: What obstacles will they face?
Developing a simple plot can be as easy as thinking about a beginning, a middle, and an end. What happens first? What challenge arises? How is it resolved? Even a short animation can have a satisfying narrative arc.
Storyboarding and shot list
Once you have a basic story, create a storyboard. This is a visual representation of your animation, frame by frame. You don’t need to be an artist; simple stick figures and descriptions are sufficient. A storyboard helps you visualize your shots, plan camera angles, and identify potential problems before you even touch your camera.
Accompanying your storyboard, a shot list details each shot, including descriptions of the action, camera angle, and an estimate of how many frames each shot will require. This document acts as your roadmap during filming, ensuring you capture all necessary footage.
- Storyboard: Sketch out key scenes and transitions.
- Shot List: Detail each shot, action, and estimated frame count.
- Dialogue/Sound Cues: Note any planned dialogue or sound effects.
By investing time in crafting your story and planning your shots, you’ll approach the actual animation process with confidence and clarity. A well-planned narrative is the backbone of any successful Lego Stop Motion Animation, making the entire creation process more enjoyable and efficient.
Mastering Filming Techniques and Movement
Filming is where your story truly begins to take shape. It’s a test of patience and precision, but with the right techniques, you can achieve smooth, lifelike movements. The key is to make very small adjustments between each photograph, ensuring that the motion appears fluid when the frames are played back.
Remember that every single frame contributes to the overall illusion. A tiny mistake can become very noticeable in the final animation. Take your time, double-check your setup, and don’t be afraid to reshoot if something doesn’t look quite right. This iterative process is a normal part of creating high-quality Lego Stop Motion Animation.
Subtle movements and onion skinning
The secret to smooth animation lies in making incredibly subtle movements. Think of it like a clock’s hands, moving imperceptibly but constantly. For LEGO minifigures, this means adjusting a leg or arm by just a millimeter or two between each shot.
- Tiny Adjustments: Move objects and characters in very small increments.
- Onion Skinning: Use your stop motion app’s “onion skinning” feature to see a translucent overlay of the previous frame, guiding your next movement.
- Test Shots: Periodically take a few test shots and play them back to check the fluidity of movement.
Onion skinning is an invaluable tool for beginners and pros alike. It allows you to see exactly how much your object has moved, helping you maintain consistent spacing and direction. Without it, achieving smooth transitions can be a significant challenge.
Camera angles and focus
Varying your camera angles can add dynamic interest to your animation. Don’t be afraid to experiment with close-ups, wide shots, and different perspectives. However, once you choose an angle for a particular shot, it’s crucial to keep your camera absolutely still for the entire sequence.
Ensure your LEGO subjects are always in focus. Most stop motion apps allow you to tap on the screen to set focus. Locking the focus can prevent it from shifting automatically, which can lead to blurry frames. A sharp image is essential for a professional look in your Lego Stop Motion Animation.
- Fixed Camera: Secure your camera firmly on a tripod.
- Vary Angles: Use different perspectives to add visual interest.
- Lock Focus: Prevent auto-focus from blurring your shots.
Mastering these filming techniques will elevate your stop motion projects from simple movements to engaging visual narratives. Patience and attention to detail are your best friends during this stage.
Bringing Your World to Life: Set Design and Props
The environment in which your LEGO characters interact is just as important as the characters themselves. Thoughtful set design and the clever use of props can significantly enhance your storytelling, add depth to your animation, and immerse your audience in your brick-built world. Don’t underestimate the power of a well-crafted backdrop and relevant accessories.
Building a compelling set doesn’t necessarily mean constructing an elaborate masterpiece. Sometimes, simple and effective designs can have a greater impact. Consider the mood and theme of your story, and let that guide your creative choices in set design and prop selection.
Building immersive backdrops
Your backdrop sets the scene. It can be as simple as a piece of colored paper or as intricate as a detailed LEGO landscape. The goal is to create an environment that supports your story and characters without distracting from the main action.
- Simple Backdrops: Use plain paper, fabric, or cardboard for clean, non-distracting backgrounds.
- Detailed LEGO Sets: Construct intricate environments using your LEGO collection for a richer setting.
- Scale and Perspective: Consider how your backdrop interacts with your minifigures and props to create a sense of depth.
Ensure your backdrop is stable and won’t shift during filming. Any movement in the background will be noticeable and can break the illusion of your Lego Stop Motion Animation. Consistency is key, even for the static elements of your set.
Clever use of props and effects
Props add detail and personality to your scenes. Small LEGO accessories, everyday objects, or even custom-made elements can bring your story to life. Think about how characters might interact with these props to advance the plot or reveal aspects of their personality.
You can also use simple visual effects to enhance your animation. For example, a piece of string can make a minifigure “fly,” and then be digitally removed in post-production. Cotton balls can simulate smoke or clouds, adding another layer of realism or fantasy.
- LEGO Accessories: Utilize minifigure tools, weapons, or other small elements.
- Everyday Objects: Integrate small, real-world items that fit the scale of your LEGO world.
- Special Effects: Experiment with fishing line for levitation or cotton for smoke.
By paying close attention to set design and prop usage, you can transform a simple arrangement of bricks into a vibrant, believable world for your Lego Stop Motion Animation. These details are what truly make your animated stories stand out.
Post-Production: Editing, Sound, and Music
Once you’ve captured all your frames, the magic isn’t over—it’s time for post-production. This is where you assemble your individual photographs into a cohesive video, add sound effects, music, and potentially voiceovers, transforming your raw footage into a polished Lego Stop Motion Animation. Good editing can elevate even simple animations to professional-looking creations.
Post-production is an opportunity to fine-tune your story, enhance the visual appeal, and add an auditory dimension that deeply engages your audience. Don’t rush this stage; it’s just as crucial as the filming itself.
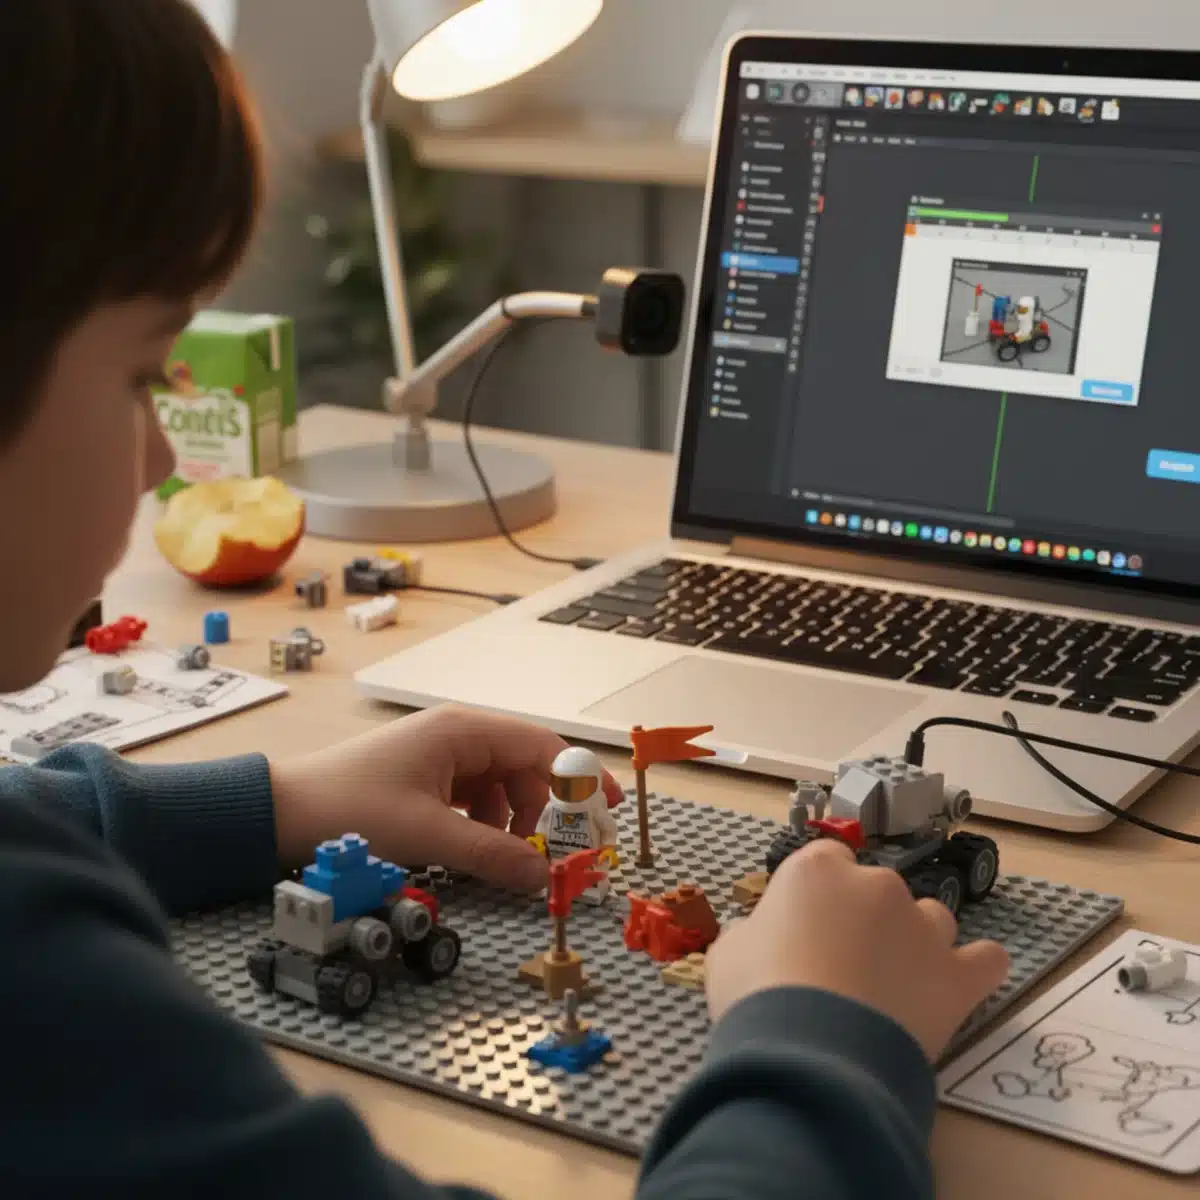
Assembling frames and timing
Your stop motion software or video editing program will allow you to import your photographs and arrange them in sequence. This is where you’ll set your frame rate, determining how fast or slow your animation plays. Experiment with different speeds to find what feels most natural for your movements.
- Import Photos: Load all your captured frames into your chosen software.
- Set Frame Rate: Adjust FPS (frames per second) for desired animation speed.
- Trim and Sequence: Arrange shots in chronological order and remove any unwanted frames.
You might find that some movements are too fast or too slow. This is where you can add or remove frames to adjust the timing. The goal is to make the motion appear as smooth and natural as possible, creating a believable flow in your Lego Stop Motion Animation.
Adding sound effects and music
Sound design is incredibly powerful in animation. It can convey emotion, emphasize actions, and build atmosphere. Think about what sounds would naturally occur in your scene: footsteps, explosions, dialogue, or ambient noises. Many websites offer free sound effects and royalty-free music that you can use.
- Sound Effects: Add realistic or comedic sounds to actions.
- Background Music: Choose music that matches the mood and pace of your story.
- Voiceovers: Record dialogue for your characters to truly bring them to life.
Music can dramatically impact the emotional tone of your animation. A suspenseful track can heighten tension, while an upbeat melody can evoke joy. Ensure the music doesn’t overpower your sound effects or dialogue. Balancing these audio elements is key to a professional-sounding Lego Stop Motion Animation.
With careful editing and thoughtful sound design, your LEGO creations will not only move but also speak, sing, and interact with a vibrant world, captivating your audience from start to finish.
Sharing Your Creation and Finding Inspiration
After all the hard work, the most exciting part is sharing your finished Lego Stop Motion Animation with the world! Showcasing your work allows you to receive feedback, inspire others, and connect with a community of fellow animators. It’s a chance to celebrate your creativity and the stories you’ve brought to life.
Sharing your animation can also motivate you to create more, pushing your skills and storytelling abilities further. The online world provides numerous platforms and communities dedicated to stop motion and LEGO creations, offering a perfect venue for your work.
Platforms for sharing and feedback
There are many online platforms where you can upload your animations. YouTube is a popular choice due to its wide reach and ease of sharing. Other platforms like Vimeo or even social media sites (Instagram, TikTok) are also great for showcasing short, engaging animations.
- YouTube: Best for longer videos and building a subscriber base.
- Vimeo: High-quality video hosting, often favored by filmmakers.
- Social Media: Ideal for short, punchy animations and reaching a broad audience.
Don’t be shy about asking for constructive criticism. Feedback from viewers can provide valuable insights into what worked well and what could be improved in your next project. Engage with your audience, answer questions, and build a community around your creative endeavors.
Finding inspiration and joining communities
The world of Lego Stop Motion Animation is vast and full of incredible talent. Watching other animators’ work can be a huge source of inspiration. Pay attention to their techniques, storytelling, and how they use LEGO in innovative ways. This exposure can spark new ideas for your own projects.
Many online communities and forums are dedicated to stop motion animation, particularly for LEGO. Joining these groups allows you to share tips, ask questions, and learn from experienced animators. It’s a fantastic way to stay motivated and continuously improve your skills.
- Watch Other Animators: Learn from the best and discover new techniques.
- Join Online Forums: Connect with a community of fellow creators.
- Experiment Continuously: Try new ideas and push the boundaries of your animations.
Remember, every animation is a learning experience. The more you create and share, the more proficient you’ll become. Your journey in Lego Stop Motion Animation is an ongoing adventure of creativity and discovery.
| Key Aspect | Brief Description |
|---|---|
| Equipment Setup | Utilize a stable camera (smartphone or DSLR) with a tripod and consistent lighting for flicker-free results. |
| Story & Planning | Develop a clear story, characters, and use storyboards and shot lists to guide the animation process. |
| Filming Techniques | Execute subtle movements between frames, utilize onion skinning, and maintain fixed camera angles and focus for smooth animation. |
| Post-Production | Edit frames, add sound effects, music, and voiceovers to enhance the narrative and emotional impact of your animation. |
Frequently Asked Questions About Lego Stop Motion
For a smooth, professional look, 24 frames per second (fps) is ideal. However, beginners can start with 10-15 fps to make the process more manageable while still achieving good results. Experiment to find what works best for your project and desired visual style.
While dedicated stop motion software offers advanced features like onion skinning, many free smartphone apps (e.g., Stop Motion Studio) are excellent for beginners. For more control and higher quality, PC software like Dragonframe is used by professionals, but it’s not essential to start.
Flicker is often caused by inconsistent lighting. Use artificial light sources like LED lamps and diffuse them to create soft, even illumination. Avoid natural light from windows, as it can change throughout your shooting session. Keep your setup stable and avoid touching light sources.
The key is making very small, incremental movements between each frame. For walking, move each leg just a tiny bit, ensuring the body also shifts slightly. Use “onion skinning” in your app to see the previous frame and guide your adjustments for fluid motion.
Absolutely! Modern smartphones have excellent cameras suitable for stop motion. The most important accessory will be a sturdy tripod to keep your phone perfectly still. Download a dedicated stop motion app to gain features like onion skinning and easy frame capture.
Conclusion: Your Journey into Lego Animation Awaits
Embarking on the journey of Lego Stop Motion Animation is an incredibly rewarding creative endeavor. It combines the joy of building with LEGO, the art of storytelling, and the technical skill of filmmaking. From conceiving your first story idea to setting up your mini-studio, meticulously capturing each frame, and finally adding the finishing touches in post-production, every step offers a chance to express your unique vision. Remember that patience, attention to detail, and a willingness to experiment are your best allies. Whether you’re aiming to create a short, humorous clip or an epic adventure, the world of LEGO provides an infinite canvas for your imagination. So, gather your bricks, set up your camera, and start bringing your brick-built dreams to life—the next great animator could be you!


