Fixing Common Lego Breakage: Essential Repair & Maintenance Tips
Advertisements
Effectively fixing common Lego breakage and implementing proactive maintenance strategies are crucial for preserving your cherished brick collections, ensuring longevity and continuous creative play for builders of all ages.
Anúncios
For any Lego enthusiast, from young builders to seasoned collectors, the sight of a broken or damaged brick can be disheartening. Understanding how to approach Lego repair maintenance is not just about fixing what’s broken; it’s about preserving the magic and extending the life of these iconic toys. This guide will help you navigate common issues and keep your Lego collection in top condition.
Anúncios
Understanding Common Lego Breakage Types
Lego bricks are renowned for their durability, but even the toughest plastic can succumb to wear and tear. Recognizing the different types of breakage is the first step toward effective repair and maintenance. Some issues are cosmetic, while others can compromise the structural integrity of your builds.
One of the most frequent problems encountered by Lego owners is brittle plastic, especially with older sets or specific colors. This often manifests as cracks or snapping when force is applied. Another common issue is stress marks, which appear as white lines on translucent or brightly colored pieces, indicating localized plastic deformation. These marks, while not always leading to immediate breakage, are a clear sign that a piece is weakened and should be handled with care.
Cracked and Chipped Bricks
Cracks can appear on almost any Lego piece, particularly those with thin walls or high stress points, such as clips or hinge elements. Chips, on the other hand, usually result from impact or rough handling, often affecting the edges or corners of larger bricks and plates. While a small chip might not affect functionality, a significant crack can render a piece unusable. It’s important to differentiate between minor cosmetic damage and structural damage that compromises the brick’s ability to connect securely.
- Stress cracks: Often seen around stud holes or connection points due to repeated assembly/disassembly.
- Impact chips: Small pieces missing from edges or corners, usually from drops.
- Brittle breaks: Clean snaps in older or sun-damaged plastic.
Identifying these types of damage early allows you to decide whether a repair is feasible or if replacement is the better option. Sometimes, a seemingly minor crack can quickly propagate, especially if the piece is under constant stress within a larger structure. Being observant and proactive can save you from more extensive damage down the line.
Essential Tools and Materials for Lego Repair
Embarking on Lego repair requires a few specialized tools and materials. While you won’t need a full workshop, having the right items on hand will make the process much smoother and more effective. Many of these items are readily available and inexpensive, making Lego repair an accessible endeavor for most.
Before beginning any repair, ensure you have a clean, well-lit workspace. Small Lego pieces can be easily lost, so a designated area helps prevent further frustration. Safety is also paramount, especially when working with adhesives or sharp tools. Always supervise younger builders if they are assisting with repairs.
Adhesives and Fillers
For repairing cracks and breaks, specialized plastic glues are essential. Super glue (cyanoacrylate) can work for quick fixes, but plastic model cement, which chemically bonds the plastic, often provides a stronger, more durable repair. For larger gaps or missing pieces, plastic fillers or epoxies designed for ABS plastic can be invaluable. Always test any adhesive or filler on a non-visible part of a spare brick first to ensure compatibility and desired results.
- Plastic model cement: Creates a strong, permanent bond by melting the plastic surfaces together.
- Super glue (cyanoacrylate): Dries quickly, good for small, precise breaks.
- Epoxy putty: Excellent for filling larger gaps or rebuilding missing sections.
Beyond adhesives, you might find small files, sandpaper (fine grit), and hobby knives useful for cleaning up edges or smoothing repaired areas. Tweezers can help with precise placement of small pieces, and a magnifying glass can reveal tiny cracks or details that might otherwise be missed. Having these tools ready will significantly improve your repair success rate.
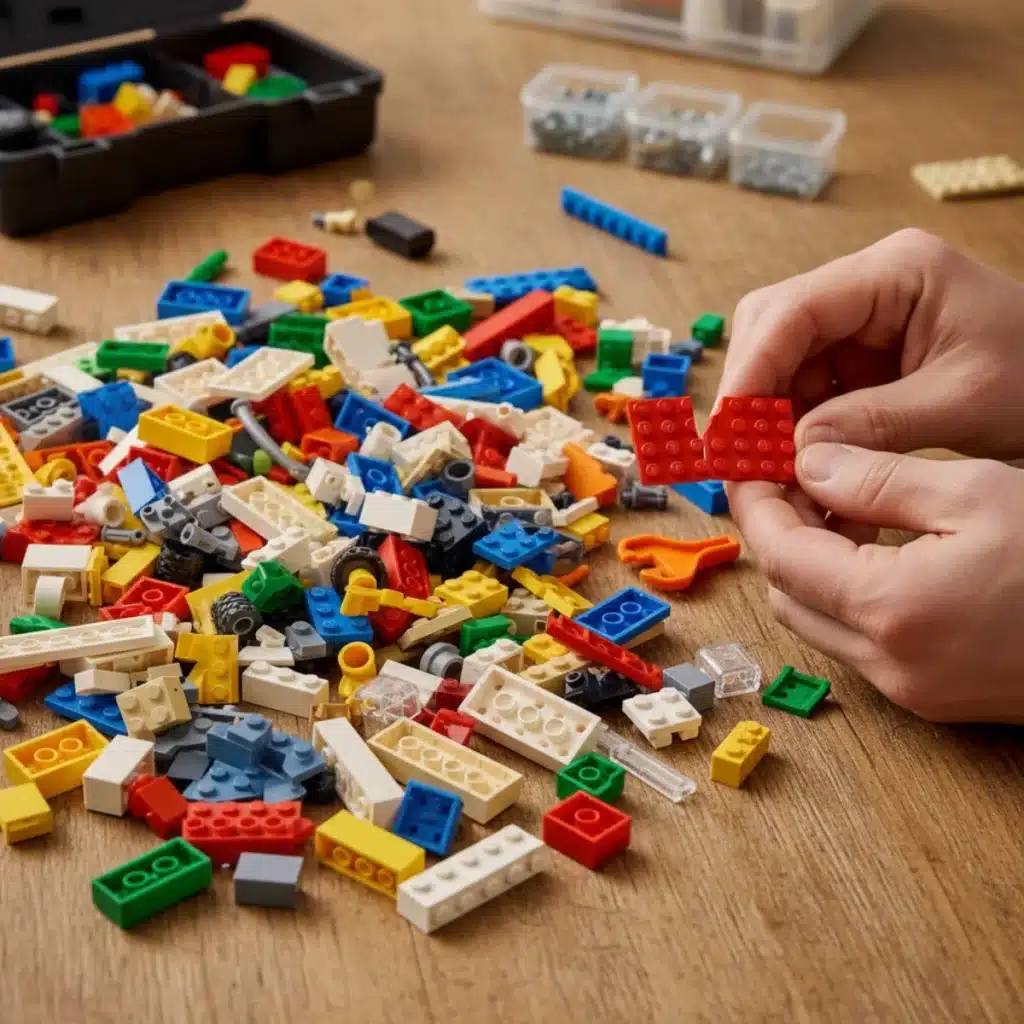
Step-by-Step Guide to Repairing Cracked Lego Bricks
Repairing a cracked Lego brick might seem daunting, but with a systematic approach, it’s quite manageable. The key is patience and precision. This guide focuses on common cracks that compromise a brick’s structural integrity, allowing you to restore its functionality.
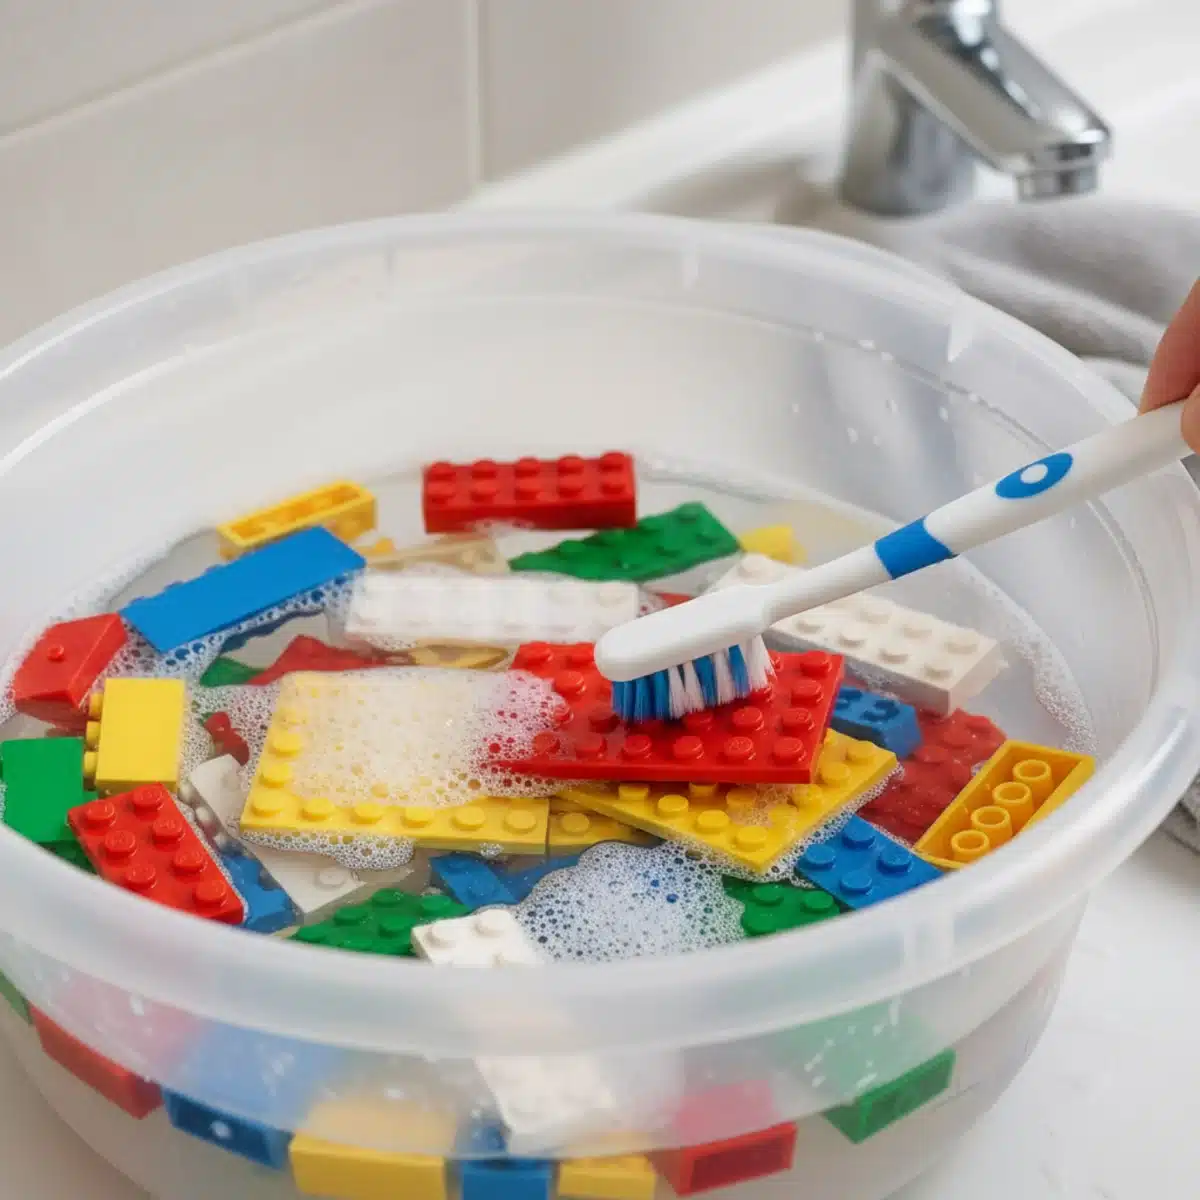
Begin by thoroughly cleaning the cracked piece. Any dirt, dust, or grease can interfere with the adhesive’s bonding properties. A gentle wash with mild soap and water, followed by complete air drying, is usually sufficient. Once clean, carefully assess the crack to determine the best repair method and adhesive.
Applying Adhesive for a Strong Bond
For hairline cracks, a small amount of plastic model cement or super glue is usually enough. Apply the adhesive sparingly to one of the cracked surfaces using a toothpick or a fine-tipped applicator. Align the cracked edges perfectly and press them firmly together for the recommended curing time. Avoid over-applying glue, as excess can seep out and bond unintended surfaces or create an unsightly finish.
- Clean the piece: Remove all dirt and oils for optimal adhesion.
- Apply glue precisely: Use a minimal amount on one surface of the crack.
- Align and press: Hold the pieces together firmly until the bond sets.
- Allow full cure: Let the repaired piece sit undisturbed for at least 24 hours.
For more significant breaks where pieces have completely separated, you might need to use a slightly more robust application. If using plastic model cement, it’s crucial to work quickly as it sets fast. Ensure the piece is correctly oriented before applying pressure. After the adhesive has cured, gently test the piece’s integrity. If necessary, a second, very thin application can reinforce the bond, but generally, one good application is sufficient for a strong repair.
Restoring Discolored and Faded Lego Bricks
Over time, exposure to sunlight, dust, and general use can cause Lego bricks to discolor or fade. This is particularly noticeable with white, gray, and blue bricks, which often yellow due to UV exposure. While complete restoration to factory new can be challenging, significant improvements are often possible, breathing new life into older collections.
The primary culprit for yellowing is UV radiation, which causes a chemical reaction in the ABS plastic. Cleaning alone won’t reverse this, but it’s an important first step. Before attempting any restoration, thoroughly clean the discolored bricks to remove any surface grime. This ensures that any subsequent treatments can work effectively on the plastic itself.
The “Retrobrite” Method
One of the most popular and effective methods for reversing yellowing is often referred to as “Retrobrite.” This involves using a hydrogen peroxide solution, often mixed with a thickener, and exposing the bricks to UV light (either natural sunlight or a UV lamp). The hydrogen peroxide reacts with the plastic, reversing the oxidation that caused the yellowing. This process requires caution, as hydrogen peroxide can be corrosive and UV light can be harmful.
- Prepare solution: Mix hydrogen peroxide cream (40 volume or higher) with a small amount of OxiClean for added effectiveness.
- Apply to bricks: Coat the yellowed bricks evenly with the solution.
- UV exposure: Place bricks in direct sunlight or under a UV lamp for several hours, rotating them periodically.
- Rinse thoroughly: After treatment, wash bricks completely to remove all solution.
It’s crucial to monitor the bricks throughout the Retrobrite process to prevent over-treatment, which can sometimes make the plastic brittle. Always wear gloves and eye protection when handling hydrogen peroxide. For less severe fading, simply storing bricks out of direct sunlight and cleaning them regularly can help maintain their color. Consistent care is key to preventing future discoloration.
Preventative Maintenance: Protecting Your Lego Collection
The best repair is often no repair at all. Implementing preventative maintenance strategies can significantly extend the lifespan of your Lego bricks and sets, saving you time and effort in the long run. Good habits around storage, handling, and cleaning are paramount for any serious collector or even casual builder.
Think of your Lego collection as an investment, not just in terms of monetary value, but in terms of the joy and creativity it brings. Protecting that investment starts with understanding the environmental factors that can harm your bricks. Heat, cold, humidity, and direct sunlight are all enemies of ABS plastic.
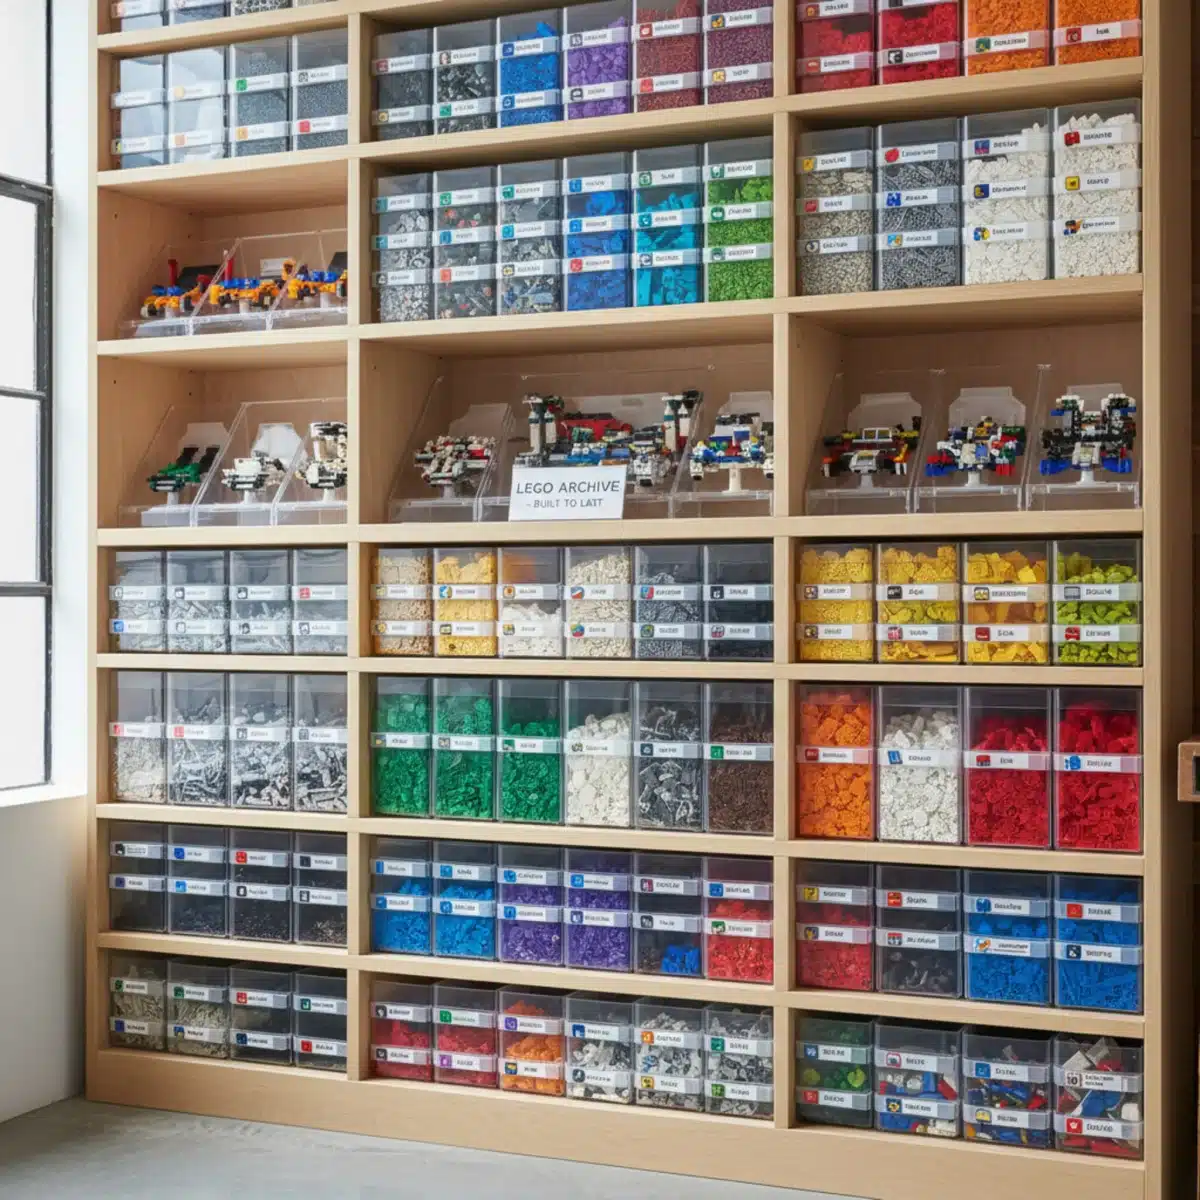
Proper Storage Techniques
Storing your Lego bricks correctly is perhaps the most critical aspect of preventative maintenance. Avoid direct sunlight, which causes discoloration and brittleness. Extreme temperatures can also warp or deform plastic. Store bricks in airtight containers to protect them from dust and humidity. Sorting your bricks by color, type, or set can also reduce handling and thus reduce wear and tear.
- Avoid direct sunlight: Store in opaque containers or dark spaces.
- Regulate temperature: Keep bricks in a stable, room-temperature environment.
- Control humidity: Use airtight containers to prevent moisture damage.
- Organize effectively: Sorted bricks are handled less, reducing wear.
Regular cleaning is another vital preventative measure. Dust and grime can build up, making bricks look dull and potentially interfering with clutch power. A gentle wash with mild soap and water every few months can keep your collection looking fresh. By adopting these simple practices, you can dramatically reduce the need for future repairs and ensure your Lego bricks remain in excellent condition for years to come.
Advanced Repair Techniques and Custom Solutions
Sometimes, basic repairs aren’t enough, or you might encounter unique damage that requires a more creative approach. Advanced repair techniques and custom solutions delve into more intricate methods, often involving small modifications or even recreating parts. These methods are usually for experienced hobbyists or those willing to experiment.
When a brick is severely damaged or a crucial piece is missing and unobtainable, thinking outside the box becomes necessary. This could involve plastic welding for complex breaks or using modeling clay and resin to cast replacement parts. These techniques require more specialized tools and materials, as well as a good understanding of plastics and their properties.
Plastic Welding and Part Fabrication
For deep cracks or breaks that compromise a large section of a brick, plastic welding can offer a robust solution. This involves carefully melting the plastic along the break line and fusing the pieces together, often using a specialized plastic welding tool or a controlled heat source. This creates a bond that is often stronger than adhesive alone, as it effectively reforms the plastic structure.
- Plastic welding: Fuses broken plastic edges using heat for a strong repair.
- Mold making: Create silicone molds from existing parts to cast new ones.
- Resin casting: Use resin to replicate intricate or rare Lego pieces.
- 3D printing: Design and print custom replacement parts for unique situations.
Another advanced technique involves fabricating replacement parts. If a small, unique piece is lost or broken beyond repair, and a new one isn’t available, you can create a mold from an existing identical piece and cast a new one using a suitable resin. For those with access to 3D printing technology, designing and printing custom replacement parts is also an option. While these methods are more involved, they offer a path to saving otherwise unsalvageable sets or completing rare models.
When to Replace vs. Repair Lego Bricks
Deciding whether to repair a damaged Lego brick or simply replace it is a practical consideration for any builder. While repairing can be satisfying and sustainable, there are instances where replacement is the more sensible and cost-effective option. This decision often hinges on the severity of the damage, the rarity of the piece, and the availability of replacements.
A good rule of thumb is to assess the impact of the damage on the brick’s functionality and aesthetic. A small scratch on a common brick might not warrant extensive repair, especially if replacements are cheap and plentiful. Conversely, a rare, intricate piece with minor damage might be a prime candidate for careful repair.
Cost-Benefit Analysis of Repair vs. Replacement
Consider the time, effort, and materials required for a repair versus the cost and availability of a new brick. For common bricks, buying a replacement from online marketplaces or brick-and-mortar stores is often quicker and cheaper than attempting a complex repair. Websites like BrickLink and Lego’s own Pick a Brick service are excellent resources for finding individual pieces.
- Common pieces: Often cheaper and faster to replace than repair.
- Rare/discontinued pieces: Repair is often the only viable option if replacements are scarce.
- Structural integrity: If a repair compromises the piece’s clutch power, replacement is better.
- Sentimental value: Personal attachment can justify repairing even common pieces.
However, for rare, discontinued, or highly specialized pieces, replacement might be difficult or prohibitively expensive. In these cases, even a time-consuming repair can be justified. Also, consider the sentimental value of a brick or set. Repairing a piece from a cherished childhood set can be more rewarding than simply buying a new one. Ultimately, the choice between repair and replacement is a balance of practicality, cost, and personal preference, always aiming to keep your Lego adventures going strong.
| Key Point | Brief Description |
|---|---|
| Identify Breakage | Recognize cracks, chips, and stress marks to determine repair strategy. |
| Gather Tools | Collect appropriate adhesives, fillers, and small tools for precise repairs. |
| Preventative Care | Implement proper storage, cleaning, and gentle handling to avoid damage. |
| Repair vs. Replace | Evaluate damage, rarity, and cost to decide between repairing or replacing bricks. |
Frequently Asked Questions About Lego Repair
While most Lego bricks are made from ABS plastic, older or specialized pieces might differ. Plastic model cement works best for ABS. For other plastics, a multi-purpose plastic glue or epoxy might be necessary. Always test on a spare piece first.
Yes, the “Retrobrite” method using hydrogen peroxide and UV light can effectively whiten yellowed Lego. However, it requires caution, including wearing gloves and eye protection, and careful monitoring to prevent potential brittleness if over-treated.
Preventative measures include proper storage away from direct sunlight and extreme temperatures, regular gentle cleaning, and avoiding excessive force during assembly or disassembly. Organizing your bricks also reduces unnecessary handling and wear.
If a piece is missing, first check if it’s a common part available for purchase from Lego’s Pick a Brick or online marketplaces like BrickLink. For rare or unique pieces, consider advanced solutions like 3D printing a replacement or mold casting.
If done correctly, a repair should not significantly affect clutch power. However, over-application of adhesive or imprecise alignment can interfere with connections. For critical structural pieces, consider replacement if a perfect fit cannot be guaranteed by repair.
Conclusion: Preserving the Joy of Lego Building
Ultimately, Fixing Common Lego Breakage: Repair and Maintenance Tips is about more than just plastic; it’s about preserving the creativity, joy, and storytelling that Lego bricks inspire. By understanding the common types of damage, equipping yourself with the right tools, and adopting proactive care routines, you can ensure your Lego collection remains a source of endless fun for years to come. Whether you’re meticulously restoring a vintage set or simply keeping your everyday bricks in top shape, these strategies empower you to tackle challenges and keep building. Embrace the process, and your Lego adventures will continue, brick by brick.


