Mastering Lego Technic Gears: Build Stronger, Faster Models
Advertisements
Are you ready to take your Lego Technic creations to the next level? Imagine building models that not only look amazing but also perform with incredible strength and speed. This guide to Mastering Lego Technic Gears: Build Stronger, Faster Models will unlock the secrets behind powerful mechanisms, allowing you to design and construct engineering marvels that move, lift, and conquer any challenge.
Anúncios
The foundational principles of Lego Technic gearing
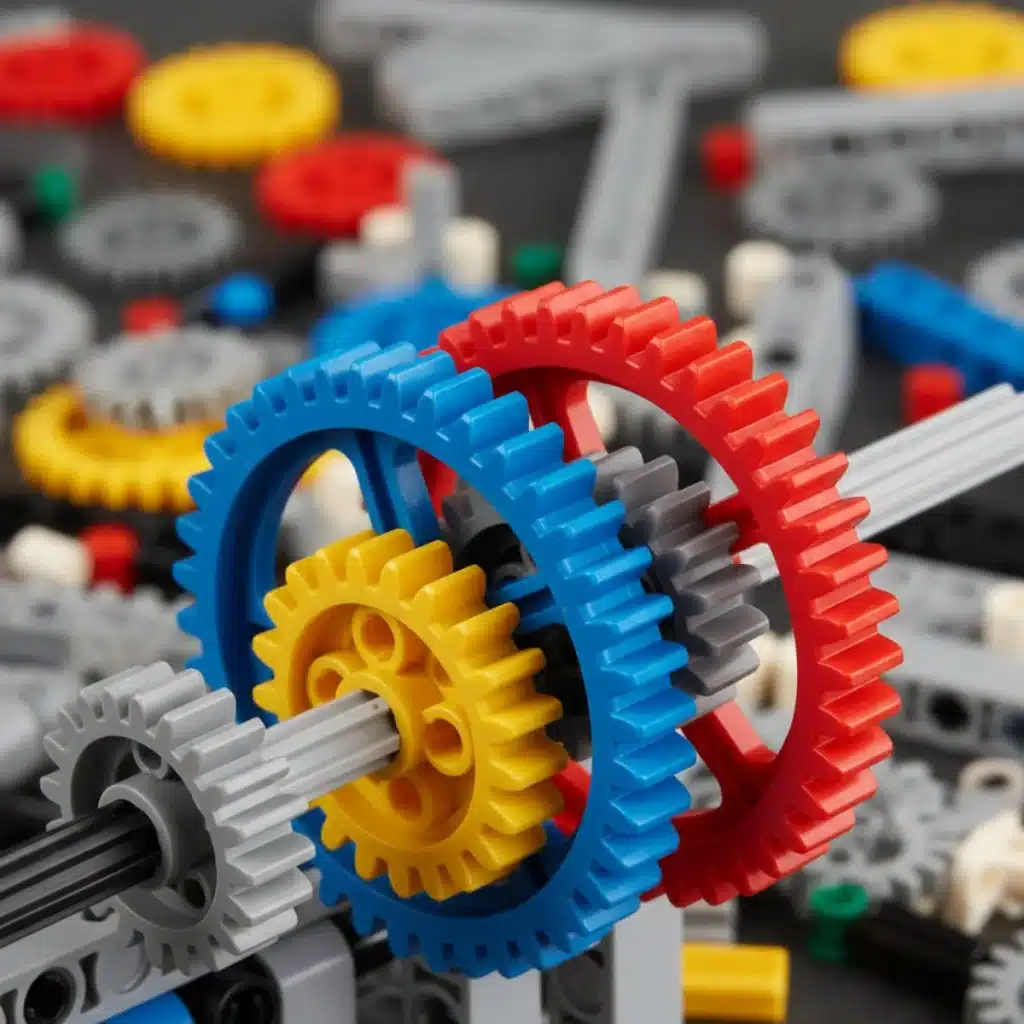
Understanding the fundamental principles of Lego Technic gearing is the first step toward creating truly dynamic and functional models. Gears are not just simple cogs; they are the heart of mechanical movement in your Lego builds, allowing you to control speed, torque, and direction. By mastering these basics, you lay the groundwork for more complex and robust designs.
At its core, gearing involves the transmission of rotational motion from one part to another. This transmission can alter the speed, force, or direction of movement. In Lego Technic, this means using various gear types to achieve specific mechanical outcomes, whether it’s making a vehicle go faster, a crane lift heavier objects, or a robot execute precise movements. The beauty of Lego Technic lies in its modularity, enabling endless combinations and experiments with these fundamental concepts.
Anúncios
Understanding gear ratios and their impact
Gear ratios are arguably the most crucial concept in Lego Technic gearing. A gear ratio describes the relationship between the number of teeth on two meshed gears. This ratio directly influences the output speed and torque of your mechanism. A larger driving gear meshing with a smaller driven gear will increase speed but decrease torque, while the opposite configuration will increase torque but decrease speed.
- Speed increase: Achieved when the driving gear is larger than the driven gear.
- Torque increase: Achieved when the driving gear is smaller than the driven gear.
- Direction change: Two meshed gears always rotate in opposite directions.
- Neutral ratio: Gears of the same size provide a 1:1 ratio, maintaining speed and torque.
Experimenting with different gear ratios is essential for optimizing your models. For instance, a fast-moving car might require a high-speed ratio, while a powerful lifting mechanism would demand a high-torque ratio. Learning to calculate and implement these ratios effectively transforms your builds from static displays into functional machines capable of impressive feats.
Exploring different types of Lego Technic gears
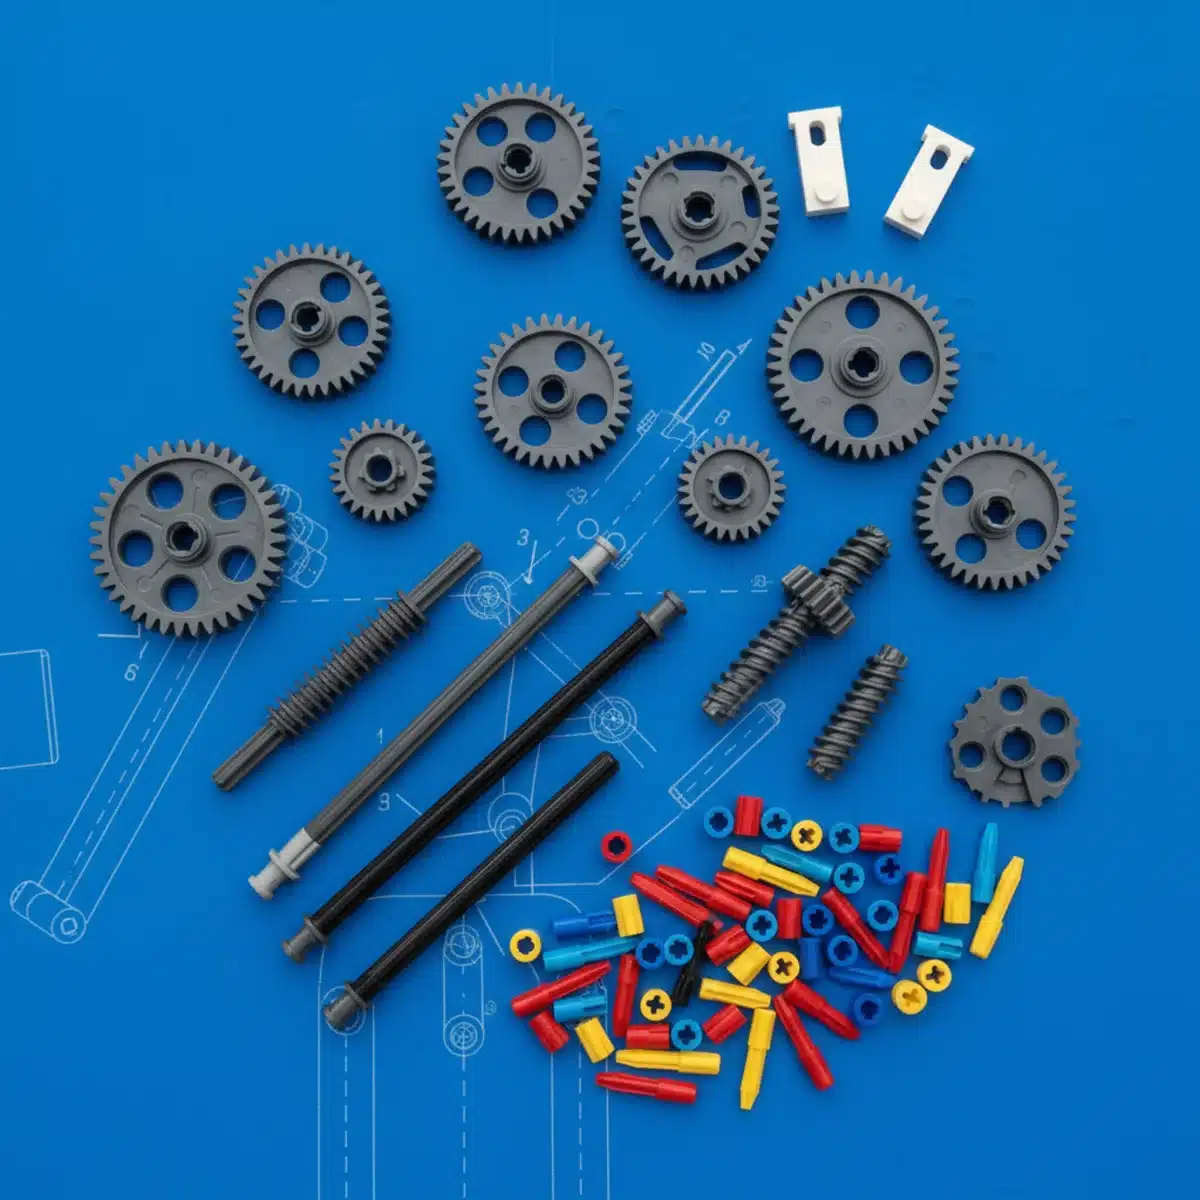
Lego Technic offers a diverse array of gear types, each designed for specific applications and mechanical advantages. Knowing when and where to use each type is crucial for building efficient and durable models. From the common spur gear to specialized worm gears, each piece plays a vital role in the intricate dance of a Technic mechanism.
The selection of the right gear type can dramatically impact the performance and reliability of your model. For example, spur gears are excellent for transmitting power between parallel shafts, while bevel gears are indispensable for changing the direction of rotation. Understanding the unique characteristics of each gear allows for innovative problem-solving and creative engineering solutions in your Lego builds.
Spur gears: The workhorses of Technic
Spur gears are the most common and versatile gears in the Lego Technic system. They transmit motion between parallel shafts and are available in various tooth counts (e.g., 8-tooth, 16-tooth, 24-tooth, 40-tooth). Their simplicity makes them ideal for a wide range of applications, from basic transmissions to complex gearboxes. However, they can be prone to backlash if not properly aligned.
- 8-tooth gear: Smallest, often used for compact designs or initial speed reduction.
- 16-tooth gear: Versatile, common in many applications, good balance of speed and torque.
- 24-tooth gear: Offers a good step in gear ratios, useful for moderate speed/torque changes.
- 40-tooth gear: Largest standard spur gear, excellent for significant speed reduction or torque multiplication.
Beyond spur gears, other types like crown gears, worm gears, and differential gears open up even more possibilities. Crown gears are used to transmit power at a 90-degree angle, often seen in steering mechanisms. Worm gears provide very high gear reduction in a compact space and offer a self-locking feature, meaning the driven gear cannot turn the driving worm gear. Differential gears are essential for vehicles, allowing wheels to rotate at different speeds during turns, preventing wheel slippage and improving handling.
Designing efficient gear trains and transmissions
Once you understand individual gears, the next step is to combine them into efficient gear trains and transmissions. A gear train is a series of interconnected gears that work together to achieve a desired output, whether it’s a specific speed, torque, or direction of rotation. Designing these systems requires careful planning and an understanding of how each gear contributes to the overall mechanism.
An efficient gear train minimizes friction and maximizes power transfer. This involves selecting appropriate gear sizes, ensuring correct meshing, and supporting axles properly. Poorly designed gear trains can lead to excessive friction, stripped gears, or even complete mechanical failure. The goal is to create a smooth, reliable system that performs its intended function with minimal energy loss.
Calculating multi-stage gear reductions
For more significant changes in speed or torque, you’ll often need to create multi-stage gear reductions. This involves linking several pairs of gears in a series. The overall gear ratio of a multi-stage system is the product of the individual gear ratios of each stage. This allows for very high reductions or increases that would be impossible with a single pair of gears.
- First stage: Input gear (A) drives intermediate gear (B).
- Second stage: Intermediate gear (B) is fixed to another driving gear (C), which drives output gear (D).
- Overall ratio: (Teeth B / Teeth A) x (Teeth D / Teeth C).
- Idler gears: Used to bridge gaps or change direction without altering the overall gear ratio.
When designing complex transmissions, consider the structural integrity of your build. Ensure that axles are securely mounted and that gears are not under excessive stress. Reinforce critical points with beams and pins to prevent flexing and ensure smooth operation. Proper lubrication (though not strictly necessary with Lego, it can reduce friction slightly in heavily loaded systems) and alignment are also key to long-term reliability.
Integrating power functions for enhanced performance
Lego Power Functions (or the newer Powered Up system) add an entirely new dimension to your Technic models by introducing motors, lights, and remote control capabilities. Integrating these components effectively with your gearing systems can bring your creations to life, allowing them to move, steer, and operate with impressive realism and functionality. This integration requires careful planning to ensure compatibility and optimal performance.
Power Functions motors come in different sizes and strengths, each suited for specific tasks. The M-Motor is versatile for general applications, while the L-Motor offers more torque and speed. The XL-Motor provides maximum torque for heavy-duty applications. Choosing the right motor and coupling it with an appropriate gear train is crucial for achieving the desired output from your powered models. Overloading a motor or using an inefficient gear setup can lead to poor performance or even damage.
Connecting motors to gearboxes
Connecting a motor to a gearbox is a fundamental step in powering your Lego Technic model. This connection often involves a simple gear reduction to increase torque and prevent the motor from stalling under load. The initial gear reduction should be chosen to match the motor’s capabilities with the demands of the model. For instance, a small motor driving a heavy vehicle will require a significant torque increase through gearing.
- Direct drive: Motor axle directly connects to a gear, often for high-speed, low-torque applications.
- Single-stage reduction: Motor drives a small gear which meshes with a larger gear, increasing torque.
- Multi-stage reduction: Multiple gear pairs for substantial torque increase, ideal for heavy loads.
- Clutches: Integrate clutch gears to prevent damage when a mechanism jams or is overloaded.
When integrating Power Functions, consider the placement of battery boxes and receivers to ensure easy access and proper weight distribution. Cable management is also important for a clean and functional build. Routing cables neatly and securely prevents them from snagging on moving parts or becoming disconnected during operation. Thorough testing of your powered mechanisms is essential to identify and resolve any issues before final assembly.
Advanced techniques for stronger and faster models
Beyond the basics, several advanced techniques can help you build significantly stronger and faster Lego Technic models. These techniques often involve optimizing structural integrity, minimizing friction, and employing specialized components to push the boundaries of what’s possible with Lego. Embracing these methods allows for truly innovative and high-performance creations.
One key aspect of building stronger models is reinforcement. Technic beams, pins, and connectors should be used strategically to create rigid structures that can withstand significant forces without flexing or breaking. For faster models, reducing friction is paramount. This can involve using bushings, ensuring proper gear alignment, and avoiding unnecessary contact between moving parts. Every small optimization contributes to overall performance.
Minimizing friction and maximizing rigidity
Friction is the enemy of speed and efficiency in any mechanical system, including Lego Technic. To build faster models, focus on minimizing friction at every possible point. This includes ensuring axles spin freely within their supports, gears mesh smoothly without excessive pressure, and moving parts have sufficient clearance.
- Bushings: Use Technic bushings on axles where they pass through beams to reduce contact area and friction.
- Proper alignment: Ensure gears are perfectly aligned to maximize tooth contact and reduce grinding.
- Reinforced structures: Double up beams or use cross-bracing to prevent chassis flex under load.
- Weight distribution: Balance the weight of your model to reduce stress on individual components and improve stability.
For strength, focus on creating closed loop structures and triangulated designs. Triangles are inherently strong and stiff, making them excellent for load-bearing sections. Avoid long, unsupported spans of beams that can flex. Distribute forces across multiple connection points rather than concentrating them on a single weak link. By combining these advanced structural and friction-reduction techniques, your Lego Technic models will not only be faster but also far more durable and reliable.
Troubleshooting common gearing problems
Even experienced builders encounter problems with their gearing systems. Troubleshooting is an essential skill that helps identify and resolve issues, ensuring your models perform as intended. Common problems range from gears slipping and grinding to entire mechanisms failing to move. Learning to diagnose these issues quickly will save you time and frustration.
The first step in troubleshooting is often observation. Watch your mechanism closely as it operates (or fails to operate). Listen for unusual noises, look for signs of stress or misalignment, and feel for excessive friction or heat. Sometimes, a problem that seems complex can have a very simple cause, such as a misplaced pin or a gear that isn’t fully seated on an axle.
Identifying and fixing gear slippage and binding
Gear slippage, often characterized by a clicking sound, occurs when gears fail to mesh properly under load. Binding, on the other hand, is when gears get stuck or move with excessive resistance. Both issues can severely impact performance and potentially damage your gears.
- Slippage causes: Insufficient tooth engagement, excessive load, or worn gear teeth.
- Slippage fixes: Adjust gear spacing, reduce load, or replace worn gears.
- Binding causes: Gears too tightly meshed, bent axles, misaligned beams, or foreign objects.
- Binding fixes: Ensure proper gear spacing, straighten axles, check beam alignment, and clear obstructions.
Another common issue is excessive backlash, which is the play or looseness between meshed gears. While some backlash is normal and necessary for smooth operation, too much can lead to imprecise movements and reduced efficiency. This can often be remedied by slightly adjusting the distance between axle centers or by using gears with tighter tolerances. Always test your fixes thoroughly to ensure the problem is resolved and no new issues have been introduced. Patience and systematic testing are your best tools for effective troubleshooting.
Creative applications and inspiring builds
With a solid understanding of Lego Technic gearing, the possibilities for creative applications are truly endless. You can move beyond replicating existing models and start designing your own innovative machines. This section aims to inspire you with ideas for incorporating advanced gearing into unique and functional creations, pushing the boundaries of your imagination and engineering skills.
Think about real-world machinery and how it operates. Can you replicate a complex gearbox from a car? Design a robotic arm with multiple articulated joints? Or perhaps create an automated factory line? Lego Technic provides the tools; your creativity provides the vision. The joy of building comes not just from following instructions but from experimenting, iterating, and ultimately bringing your own mechanical ideas to life.
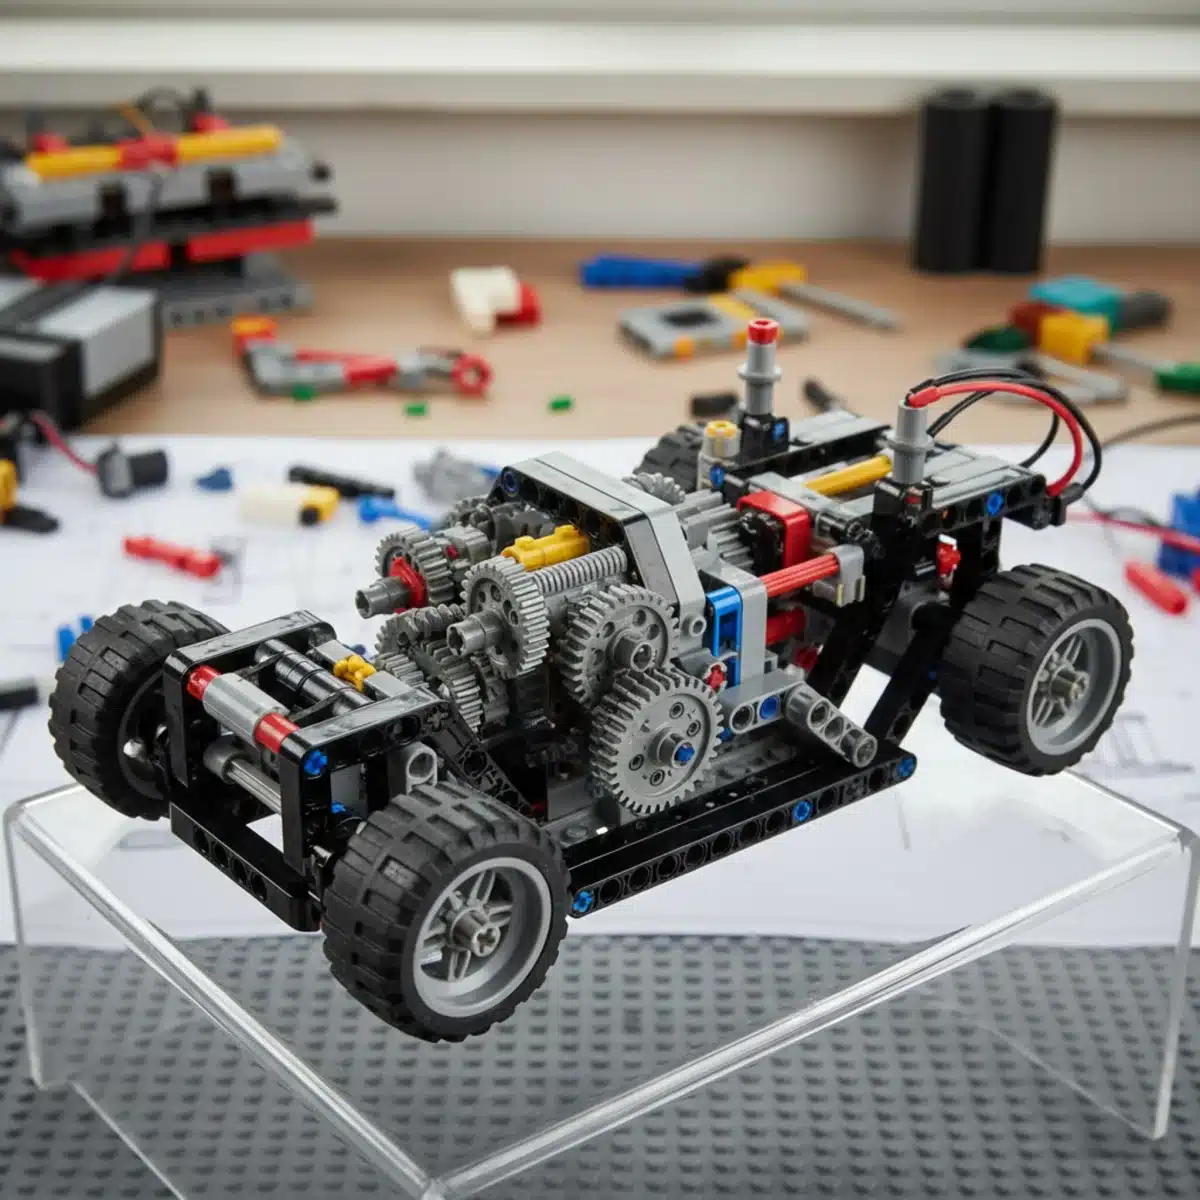
Building complex mechanisms and automated systems
Leveraging your knowledge of gear ratios and power functions, you can construct incredibly complex mechanisms. Imagine a multi-speed gearbox for a Lego Technic vehicle, allowing it to adapt to different terrains or tasks. Or a fully automated conveyor belt system that sorts Lego bricks by color. These projects combine multiple gearing principles and often require meticulous planning and execution.
- Robotic arms: Utilize worm gears for self-locking joints and planetary gears for compact power.
- Automated vehicles: Implement differential gears for steering and multi-stage gearboxes for variable speed.
- Lifting mechanisms: Employ high-torque gear reductions for cranes and forklifts.
- Walking robots: Design complex linkages and synchronized gear trains to simulate natural movement.
The key to successful complex builds is to break down the design into smaller, manageable sub-assemblies. Focus on perfecting each individual mechanism before integrating it into the larger system. Don’t be afraid to experiment and iterate; sometimes the best solutions come from unexpected combinations. Share your creations with the Lego community, learn from others, and continue to challenge yourself with increasingly ambitious projects. The journey of mastering Lego Technic gears is one of continuous learning and boundless creativity.
| Key Aspect | Brief Description |
|---|---|
| Gear Ratios | Determine speed and torque output; crucial for model performance (e.g., faster cars, stronger lifts). |
| Gear Types | Spur, bevel, worm, and differential gears each serve specific functions in power transmission. |
| Power Functions | Integrate motors and remote control for dynamic, functional, and realistic Lego Technic models. |
| Troubleshooting | Diagnose and fix common issues like gear slippage or binding for reliable, smooth operation. |
Frequently asked questions about Lego Technic gears
Lego Technic gears primarily transmit rotational motion, allowing builders to control speed, torque, and direction in their models. They are essential for creating functional mechanisms like gearboxes, lifting systems, and vehicle drivetrains, enabling complex movements and interactions within Lego builds.
To calculate a gear ratio, divide the number of teeth on the driven gear by the number of teeth on the driving gear. For example, if an 8-tooth gear drives a 24-tooth gear, the ratio is 24/8 = 3:1. This means the driven gear will turn one-third as fast but with three times the torque.
For high torque, a smaller driving gear meshing with a larger driven gear is ideal. Worm gears are also excellent for very high torque reductions and provide a self-locking mechanism, meaning the output cannot back-drive the input, which is useful for lifting or holding heavy loads.
Yes, combining different types of Lego Technic gears is common and often necessary for complex mechanisms. For example, spur gears can be used in a gearbox, which then connects to bevel gears to change axle direction for a steering system. Understanding each gear’s purpose helps in effective combination.
Gears can slip if they don’t mesh properly, are under too much load, or are worn out. Binding usually occurs if gears are too tightly meshed, axles are bent, or there are structural misalignments. Proper alignment, appropriate gear ratios for the load, and sturdy construction prevent these common issues.
Conclusion
Mastering Lego Technic gears is an incredibly rewarding journey that transforms simple bricks into sophisticated machines. By delving into gear ratios, understanding various gear types, designing efficient transmissions, integrating power functions, and troubleshooting common issues, you unlock a world of engineering possibilities. This knowledge empowers you to build not just stronger and faster models, but also more intelligent and functional creations that truly reflect your ingenuity. Continue to experiment, learn, and challenge yourself, and you’ll discover that with Lego Technic, the only limit is your imagination.


